
 9,3 / 10 - 4.136 reviews
Want to buy a SafePal S1? Buy it here!
English manual SafePal S1
Buy SafePal S1
Installing your SafePal S1
The package contains:
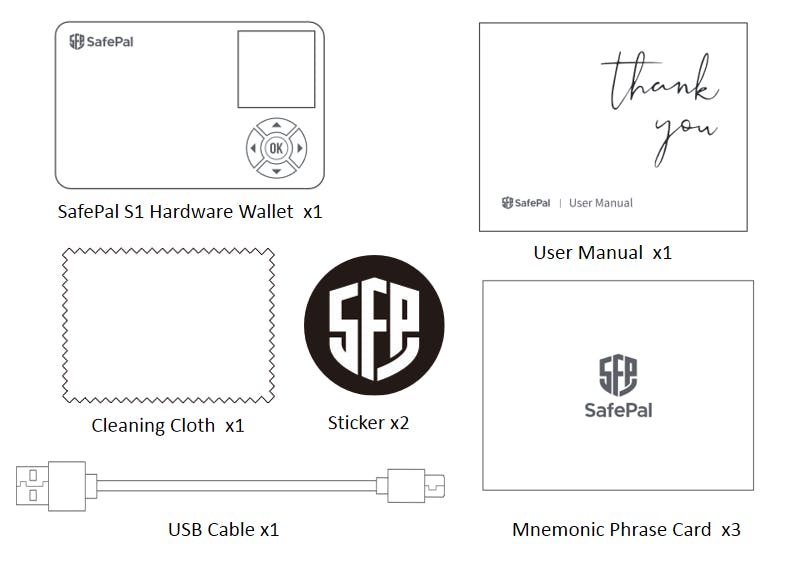
In following instructions, “SafePal S1” refers to “SafePal S1 Hardware Wallet”, and “APP” refers to “SafePal APP”
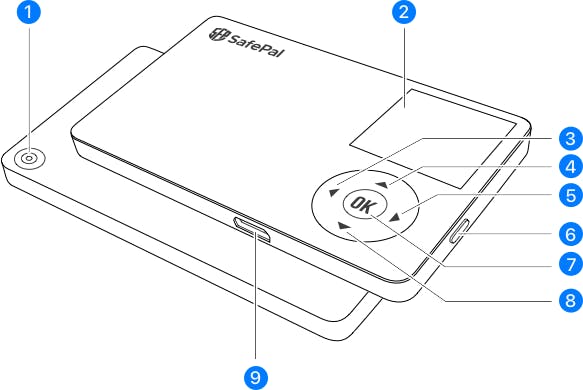
Structure and buttons
1. Camera 2. Screen 3. Left 4. Up 5. Right 6. Power 7. Ok 8. Down 9. Chargerport
Step 1: Download SafePal App.
If you haven’t downloaded SafePal App, do so first. Scan the QR code to download.

Step 2: Create/Recover wallet
Start SafePal S1 and follow the instructions on the screen to create or recover your wallet.
Step 3: Bind SafePal with the App
Click “Add Wallet” in the App, and bind with SafePal S1 by scanning QR codes.
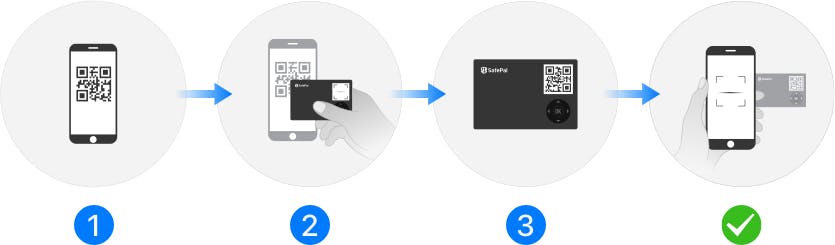
Step 4: Start secure and easy transactions using SafePal!
Step 5: 3 Tips to Keep Your Assets Secure
Always keep your mnemonic phrase in secure locations.
Mnemonic phrase is the only proof of ownership for your crypto assets. Once lost, nobody including the SafePal team could help to recover your assets. Please store the phrase in offline and secure places, such as a safe box.
Set a strong PIN code
PIN would be used as your signature when you need to process a transaction. Please avoid to use weak PIN codes such as “123456” or “666666”. Try to set a complex and strong PIN code instead.
Reset wallet when you stop using this device
In cases when you don’t need to use this device anymore, please remember to wipe all data by resetting wallet (Settings—>Reset Wallet). Once reset, you can only recover the wallet via correct mnemonic phrase. Don’t forget to back up mnemonic phrase before reset.
Attention!
- The device is meant to function within the temperature from 0℃ to 55℃ (32℉ to 131℉), and be stored within the temperature from -20℃ to 60℃(-4℉ to 140℉).
- Improper charging may lead to explosion of the device, please charge with 5V/1A adapter.
- Do not use irritating chemical solvents for cleaning. Please clean with a damp paper towel or soft cloth.
- Keep away from fire.
- To protect the environment, do not throw the device in the trash.
- Do not try to open, change or repair the device by yourself.

 WhatsApp
 E-Mail